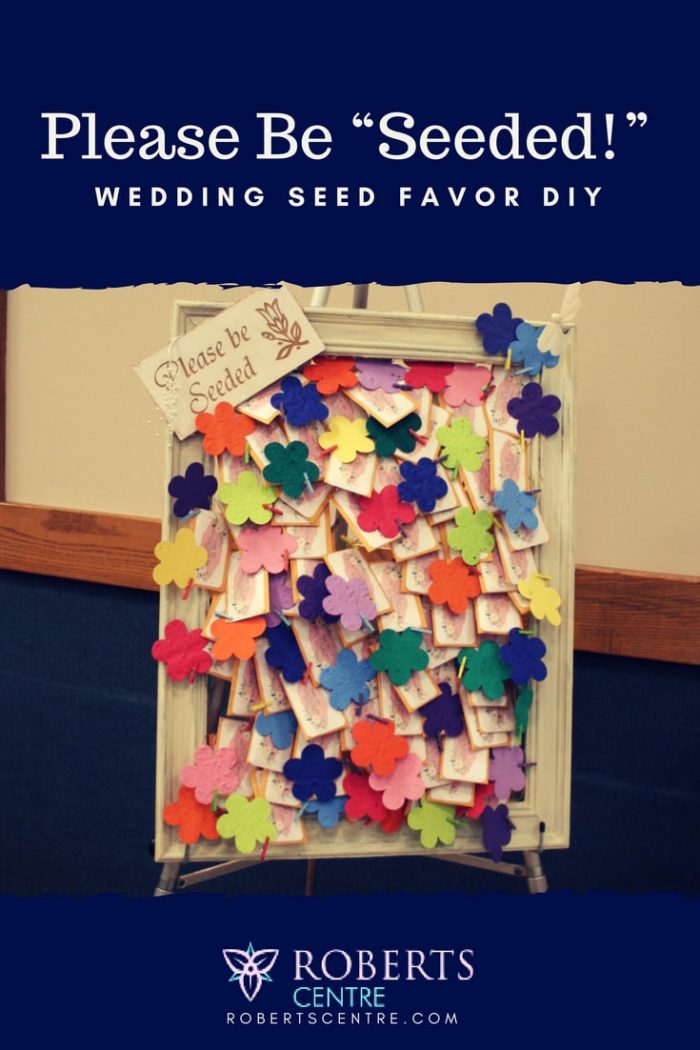
Springtime weddings sprout perfectly appropriate flower-related favors. If you love this fun floral idea, read ahead for our wedding seed favor DIY.

Wedding Seed Favor Frame Materials
Although Pinterest has dozens of ways to create the perfect “Please be seeded” frame for your reception seed sharing, we chose the easiest, quickest way to picture perfect success. We know the last thing you need to be doing the week before your wedding is considering how to keep your seed packets on string via teeny tiny little clothespins!
Start by being thrifty! Spend your money on food-your guests will appreciate it! You can find the perfect frame at a thrift store for a few dollars. Search for a frame 16” x 20” or larger so you don’t have to designate someone to constantly refill the favors. Material matters! You’ll want to procure a solid wood frame for this project.
Wedding Seed Favor Frame DIY
After finding your frame, you’ll want to carefully remove the glass, image, and backing and recycle anything you can’t use in another project. If your frame has a glossy finish, you’ll want to rough it up a bit with some light grit sand paper to help your paint stick. Painting prior to your project is recommended as you can handle it more freely and get more of the awkward areas covered if it’s an elaborately carved frame. Keep in mind the colors and theme for your wedding. If you’re going for rustic charm, a quick coat of paint using a brush should do the trick. For weddings with more chic than shabby theme, you may want to spray paint your project so you get thorough coverage. 
While your frame is drying you can get your chicken wire ready. Cut out a piece the same size as your frame – the exterior size of your frame NOT the interior! Painting the wire isn’t recommended as paint won’t bond well. If you MUST have pink chicken wire for your décor, use a spray paint specially made for metal.
Line up your chicken wire so it’s even on the back of the frame. You can use painter’s tape to secure it in place while you staple it on. Use a manual staple gun to fix the chicken wire to the frame. Now flip it over and use clothes pins to either attach your seed packs or attach ribbon loops to your packets and hang them from the ends of just a few pins.
Please Be Seeded Sign
Now you’re ready for your wedding seed favor sign! You want to pun this favor up for sure. The easiest way to create your sign when you have little crafting talent is printing onto a readymade sign. You’ll need:
- A basswood sign from your local hobby shop
- A pack of printable labels
- A flat, hard item for smoothing (a credit card actually works well)
- An ink jet printer

Next, peel off ALL the printable paper until all you have is the backing. Next, create your sign using a computer program that lets you save as a jpeg file. If you have no photo software on your computer, Power Point will let you do this easily. Open your jpeg file and reverse the image. In Microsoft Office Picture Manager, click on Edit, Rotate and Flip, and Flip Horizontal. Print a test sheet! Once your image is reversed perfectly, print on the backing and immediately lay flat on your sign. Use your smoothing item to push the image onto the wood. Let it set for a few minutes and then gently peel off. Your image should be transferred perfectly! If you don’t care for the plain wood you can use a flat craft paint to paint your sign prior to the transfer.
Love this and want more ways to make your upcoming wedding uniquely yours? Talk to the professional wedding planners at Roberts Centre! Contact us today at (937) 283-3272 to schedule an appointment.
Tags: wedding details, wedding favors, wedding insperation, wedding tips

